Skip to content

Silkscreen Printing Unit Lesson 5: Planning a Multilayer Silkscreen Print

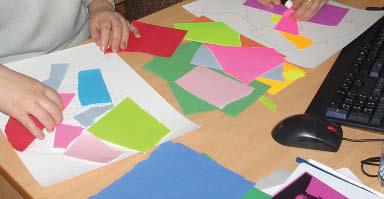
This image shows students' hands arranging various multi colored pieces of paper into a composition.

The planning session outlined in this lesson is an important step for creating a successful multilayer print series. Students synthesize color theory, the use of color by Andy Warhol, and their own aesthetic choices in this lesson to plan color combinations for their prints. Students create a collage with shapes of color that will be the template for their stencils in Lesson 6.

Objectives

  • Students identify and discuss design elements found in Warhol’s Camouflage series such as layering, color, and shape.
  • Students apply their knowledge of color theory to plan a series of prints.
  • Students experiment with creating multiple color combinations and compositions.

Vocabulary

Materials

Procedure

  1. Review color theory and the color wheel from Lesson 1 with students. They can also refer to the Color Terminology Handout for review.
  2. Show students one or two artworks from Warhol’s Camouflage series and discuss the following as a class:
    • What type of color scheme did Warhol use (ex: warm or cool colors to convey a mood, complementary colors to cause colors to “pop or vibrate” or create contrast and balance, analogous colors for visual appeal, etc.)?
    • How did he combine color, layering, and shape to create a unified artwork?
    • Can you figure out which color Warhol printed first, second, and third? How does the opacity of certain colors help or hinder layering?
  3. Discuss with your students the importance of planning their color combinations for their multilayer prints before they begin to print. All ink colors have different levels of opacity. When a light color is printed over a dark color, the two mix and the result is a variant of the intended color.
  4. Have students choose two combinations of three color layers, the fourth color layer is the source image on the screen and will be black. They can make sketches of their combinations in their sketchbooks.
  5. Next have students use colored collage paper based on their sketches to make scale versions of their prints. Then overlay the film positive to check the color combinations and compositions.
  6. Remove the film positive transparency and glue the final color combinations down onto the paper.

Wrap-up

After students have glued their final color combinations down onto the paper:

  • Ask students which color combination and composition they like best and discuss why.
  • Explain that the collage they chose will serve as their guide for cutting their stencils in the next lesson.

Assessment

The following assessments can be used for this lesson using the downloadable assessment rubric.

  • Aesthetics 1
  • Communication 3
  • Creative process 5
  • Creative process 6
  • Critical thinking 1