Skip to content

Silkscreen Printing Unit Lesson 3: Preparing and Exposing Photographic Silkscreens

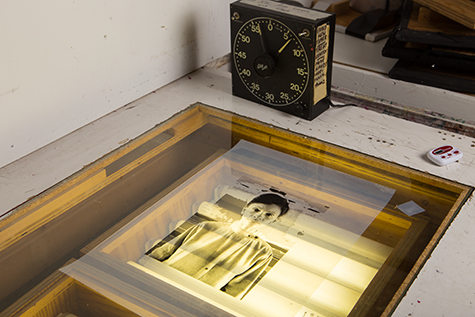
This is an image of a film positive on top of a light table. The light table had four fluorescent lights underneath a glass top. There is a black clock timer in the background.

Photo by Sean Carroll

This lesson walks students through the process of coating silkscreens with light sensitive emulsion, drying coated screens, and exposing screens using their film positives.

Objectives

  • Students will learn how a source image is exposed onto a silkscreen.
  • Students will apply the proper steps of coating, drying, and exposing their images onto their silkscreens.

Vocabulary

Discussion Questions

Review theĀ Preparing and Exposing Photographic Silkscreens Powerpoint, then ask students:

  1. How is an image transferred onto a silkscreen?
  2. What does it mean to “expose” an image onto a screen?

Materials

Procedure

  1. Review the Preparing and Exposing Photographic Silkscreens Powerpoint as a class.
  2. If your screens are new, clean them first with Comet to degrease the screens.
  3. Read and follow all of the instructions that come with the emulsion. Sensitize the emulsion, stir, and let sit for sixty minutes to allow time for the air bubbles to rise to the surface.
  4. In a darkened room or in a room with a yellow safe light, coat silkscreens with the emulsion and scoop coater. Follow the directions included with the emulsion.
  5. Store the coated silkscreens in a dark room or light-tight box until they are dry. Screens may be stacked on top of each other using blocks in between to save space. Screens should dry with the flat side down.
  6. Once the screens are dry they may be put in black plastic garbage bags until you are ready to expose them.
  7. Expose the silkscreen with the students’ film positives. A screen exposure chart should be included with your emulsion. If not, you will need to test exposure times. A good time to start with is five minutes.
  8. Immediately following exposure, wash out the screens with water and a sponge, or a spray nozzle if you have one in your classroom. You will see some of the emulsion begin to leave the screen in the areas that were protected by the image printed on the film positive. Follow the wash-out instructions included with the emulsion. Dry the screens completely before the students print their first layers.

Wrap-up

When all groups are finished exposing and drying their screens, complete the following:

  • Have students use masking tape to tape off the areas around the edges of the screen where there is no emulsion.
  • Have students pull a proof of their silkscreens to ensure that the image was exposed properly.

Assessment

The following assessments can be used for this lesson using the downloadable assessment rubric.

  • Communication 3
  • Communication 4
  • Creative process 2